Creating picture packages
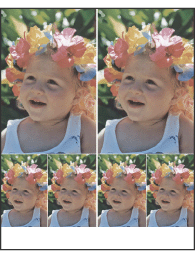
With the Picture Package command, you can place multiple copies of a source image on a single page, similar to the photo packages traditionally sold by portrait studios. You also have the option of placing different images on the same page. You can choose from a variety of size and placement options to customize your package layout.

Example of a picture package layout
To create a picture package:
- Do one of the following:
- Choose File > Automate > Picture Package. If you have multiple documents open, Picture Package uses the frontmost document.
- From the File Browser menu, choose Automate > Picture Package. The Picture Package command uses the first image listed in the File Browser unless you select a specific image before launching the Picture Package command.
- Add one or more images to the layout by doing one of the following:
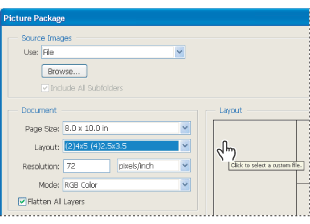
- In the Source Images area of the Picture Package dialog box, choose either File or Folder from the Use menu and click Browse (Windows) or Choose (Mac OS). When choosing Folder, you can select Include All Subfolders to include images inside any subfolders.
- Click a placeholder in the preview layout and browse to select an image.
- Drag an image from the desktop or a folder into a placeholder.
- In the Document area of the Picture Package dialog box, select page size, layout, resolution, and color mode. A thumbnail of the chosen layout is displayed on the right side of the dialog box.
- Select Flatten All Layers to create a picture package with all images and label text on a single layer. Deselect Flatten All Layers to create a picture package where each image is on a separate layer and each label is on a separate text layer. Placing each image and label on a separate layer lets you update your picture package even after it's been saved. Keep in mind that not flattening layers increases the file size of your picture package.
- In the Label area, choose the source for label text from the Content menu or choose None. If you choose Custom Text, enter the text for the label in the Custom Text field.
- Specify font, font size, color, opacity, position, and rotation for the labels.
- Click OK.
If you're only using the frontmost document or a selected image from the File Browser for the Picture Package, you can skip to step 3.

Clicking a placeholder in the Picture Package preview layout lets you browse to select an image.

Dragging an image from the desktop into a placeholder to add an image in the Picture Package
You can change any image the layout by clicking a placeholder and browsing to select an image.
You can also create your own custom layouts. For more information, see Customizing picture package layouts.