Creating a PDF presentation
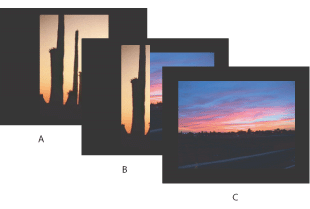
The PDF Presentation command lets you use a variety of images to create a a multipage document or slide show presentation. You can set options to maintain image quality in the PDF, specify security settings, and set the document to open automatically as a slide show.

To create a multipage PDF Presentation:
- Do one of the following:
- From the main menu, choose File > Automate > PDF Presentation.
- From the File Browser menu, choose Automate > PDF Presentation. All the image files displayed in the File Browser will be added to the PDF Presentation. In the File Browser, you can select the image files you want for the PDF Presentation. Otherwise, the PDF Presentation command will select all the images currently displayed in the File Browser.
- If you did not launch the PDF Presentation command from the File Browser, click Browse and navigate to select files for the PDF Presentation. Select the Add Open Files option to add files already open in Photoshop.
- In the Output Options area of the PDF Presentation dialog box, select one of the following:
- Select the View PDF After Saving option if you want Adobe Acrobat or the Adobe Reader to open the PDF after it's created.
- If you selected Presentation as the Output Option, in the Presentation Options area, you can specify the following options:
- Click Save.
- In the Save dialog box, enter a name for the PDF Presentation and select a destination for the saved file. Click Save.
- In the PDF Options dialog box, select the options you want, and click OK.
- Embed Fonts ensures that all fonts used in the file are displayed and printed, even on computers that do not have the fonts installed. Bitmap fonts, fonts that don't allow PDF embedding, substitute fonts, type that uses the faux bold style, and warped type cannot be embedded. Selecting Embed Fonts increases the size of the saved file.
- Use Outlines for Text saves text as paths. Select this option if embedding fonts results in a file that is too large, if you plan to open the file in an application that cannot read PDF files with embedded fonts, or if a font fails to display or print correctly. Text saved as outlines is not searchable or selectable in a PDF viewer. You can, however, edit the text when you reopen the file in Photoshop.
- Click OK. Photoshop closes the PDF options dialog box and creates the PDF Presentation. A dialog appears telling you if the PDF Presentation was successfully created.
Note: Click a file to select it. Shift-click to select a series of files. Ctrl-click (Windows) or Command-click (Mac OS) to select noncontiguous files.
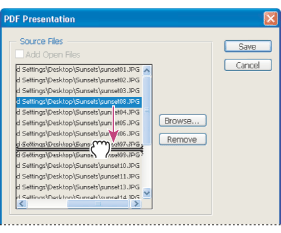
You can remove any unwanted file by selecting it in the Source Files window, and then clicking the Remove button.
The files in the Source Files window are used to generate the pages in the PDF Presentation, starting with the topmost file for the first page and progressing down the list for subsequent pages. To reorder a file in the sequence, select the file and drag it to a new position in the list.

Multi-Page Document
Creates a PDF document with the images on separate pages.
Presentation
Creates a PDF slide show presentation.
Advance Every [5] Seconds
Specifies how long each image is displayed before the presentation advances to the next image. The default duration is 5 seconds.
Loop After Last Page
Specifies that the presentation will automatically start over after reaching the end. Deselecting this option specifies that the presentation will stop after the final image is displayed.
Transition
Specifies the transition from one image to the next.
Encoding
Determines the compression method (Zip or JPEG). For more information, see About file compression.
Save Transparency
Preserves transparency when the file is opened in another application. (Transparency is always preserved when the file is reopened in Photoshop or ImageReady.) This option is not available if the file contains a spot color channel or does not contain transparency.
Image Interpolation
Anti-aliases the printed appearance of a low-resolution image.
Downgrade Color Profile
If you selected ICC Profile (Windows) or Embed Color Profile (Mac OS) for a version 4 profile in the Save dialog box, this option downgrades the profile to version 2. Select this option if you plan to open the file in an application that does not support version 4 profiles.
PDF Security
Specifies security options such as password protection and restricted access to a file's content. Choose 40-bit or 128-bit RC4 encryption for a lower or higher level of security. For more information on PDF security, see Saving files in Photoshop PDF format (Photoshop).
Include Vector Data
Preserves any vector graphics (such as shapes and type) as resolution-independent objects, ensuring smoother output. When it is selected, you can select the following options:
Note: The PDF viewer may display a substitute font if both Embed Fonts and Use Outlines for Text are deselected.